 |
| 1st I sorted the pieces by what color they would need to be painted. Then I taped them onto a piece of scrap MDF board. |
 |
| After a light coat of red or white I'm ready for assembly. |
 |
| I like to use Aleenes "Tacky" glue. You can find it any craft store. It holds really well & even within 24 hours you can still manipulate items with little to no damage. I square up my walls & the tab & slot design goes together quickly. |
 |
| I put a thin strip of blue painters tape around the roofs perimeter. This hides any imperfections in the corners as well as adds a coped effect. When it's painted the tape has a crinkled effect similar to rolled roofing material. |
 |
| I added some bracing as well as a lip to attach the cardboard roof to. |
 |
| The garage doors are layered so you get a real crisp paint line as well as depth to the door. I made one of the doors 3/4 open soI could add a car on a lift inside. |
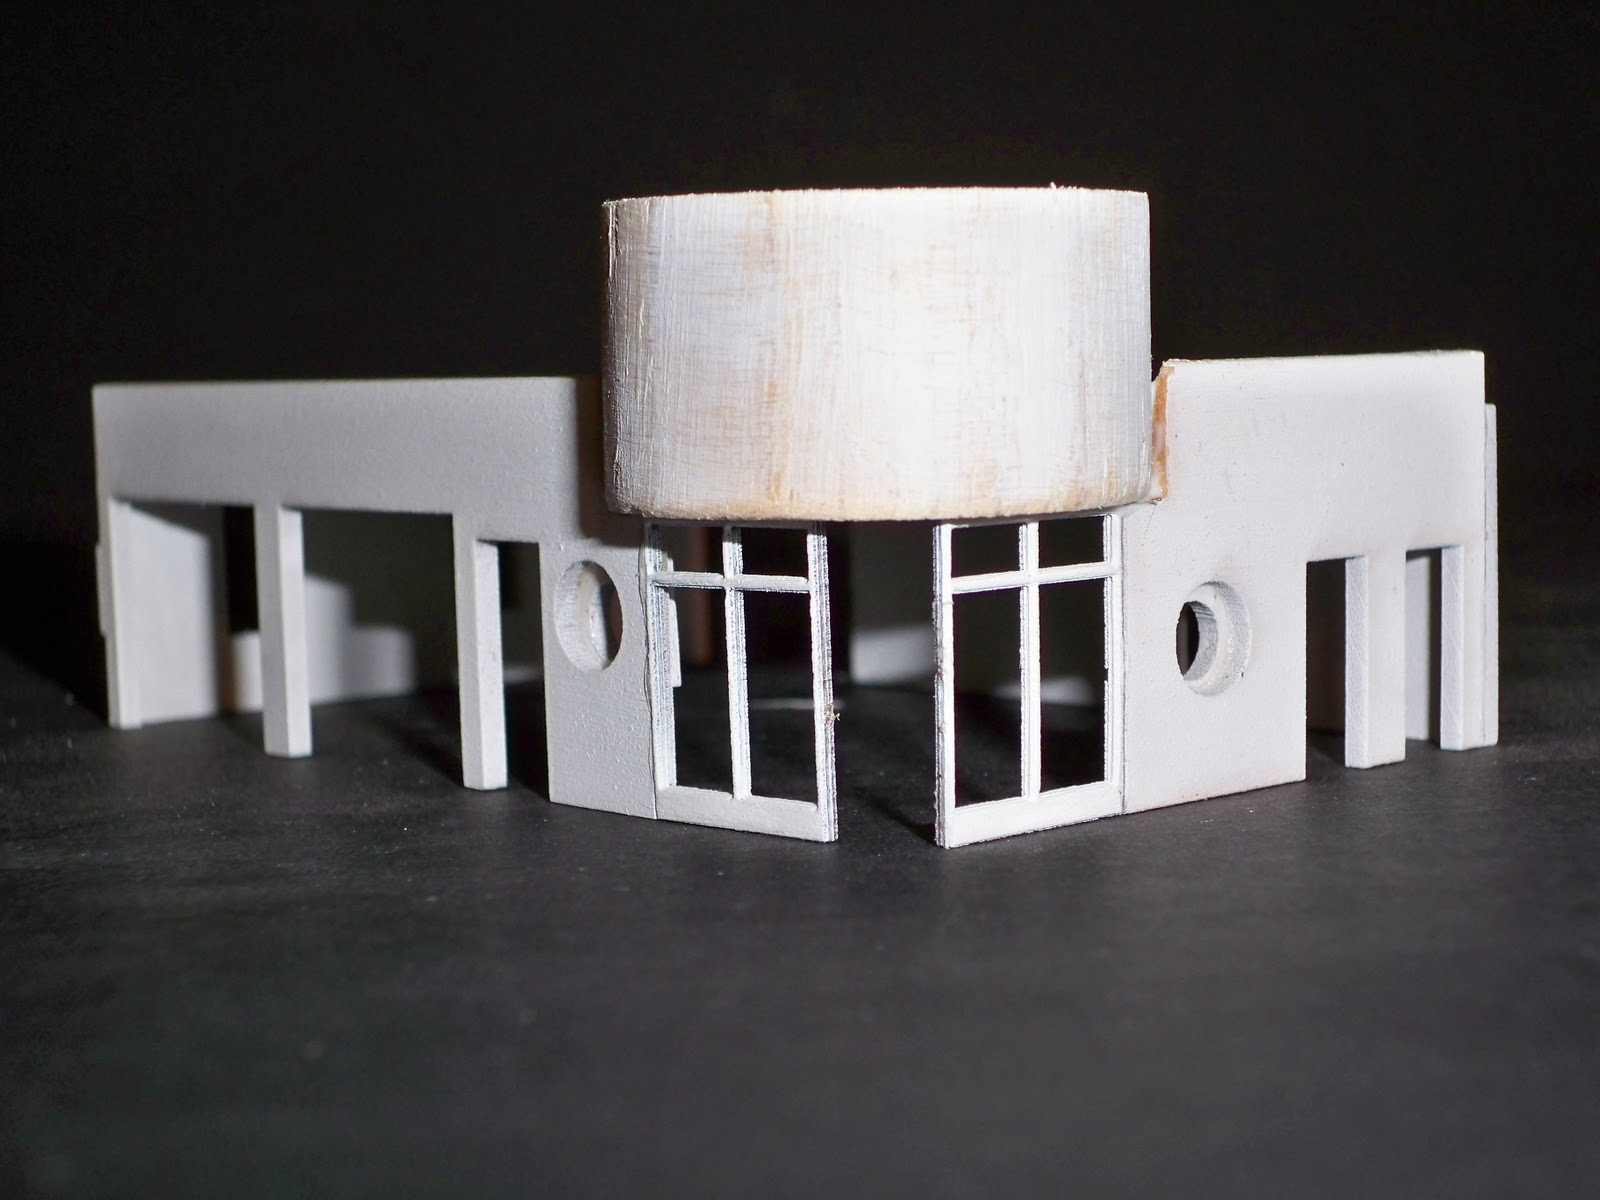 |
| Without the doors it's pretty stark white. The 2 round windows are a nice touch & they have an added block behind them for added depth. The round edifice over the doors is a piece of dowel rod. |
 |
| The garage floor is pre-scribed Plastruct sidewalk, painted barn wood gray & in the office area I used a red fine tip permanent marker for a checker board floor & some scrap wood painted red for a counter. The lift is a toothpick with a cut & formed scrap of sheet plastic. All of that is painted aluminum & some dry brushed black for wear. |
 |
| Once the floor & the building are united it comes together. The window glazing is clear plastic. The signs are all plain white paper. I glued the signs on with an Elmer's glue stick. I like those because they go on flat, don't drip, & the paper can be manipulated without worrying about tearing. |
 |
| Here's just another angle on the building. There aren't a lot of parts to the structure itself, so it goes together relatively quickly. |
 |
| The roof, as previously stated is simply cardboard. I scribed some tar paper lines onto it to give it some texture. I then painted it black & added some white dry brushing. The dry brushing helps to bring out some details in the scribing & of the taped coving. |
.......Coming up next? Where to plant this in the city?